Change Drive Icon in Windows Vista With Drive Icon Changer
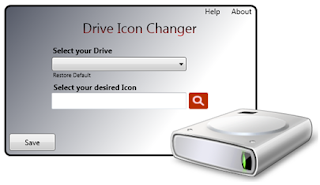
Changing drive icon in Windows Vista is easy if you use Drive Icon Changer since it is a free program that has been specifically designed to do the changing instantly. If creating .inf file in root drive sounds too technical for you, or you just want to do it the easiest way you can, then this is the right utility to use. It just takes a couple of clicks to apply custom drive icon for each drive in your Windows explorer.
How to Change Drive Icon in Windows Vista Using Drive Icon Changer
- After downloading the program, run it as an administrator.
- Select which drive you want to change the icon from the drop-down menu within the main window of the program.
- Choose which icon from your icon collection to be used to replace the original drive icon.
- Click the save button and it's all done.
If the result of changing is ugly, you can replace it with another icon as many as you need to or you can just get back to the standard drive icon.
This program changes the drive icon by automatically creating a file named as Autorun.if. This file, along with a copy of the selected icon, are put inside the root drive. Both are hidden files, so it won't be displayed inside the root drive unless you want it to.
Though you can change the drive icon instantly using the program, if you want to learn the autorun.inf file, it only takes a little bit time of yours to be able to utilize the file to manually change the icon drive.
Drive Icon Changer is a freeware for Windows Vista and requires .NET Framework 3.5 SP1 to run it on your computer. If you don't have this .NET Framework 3.5 SP1 installed yet, then you need to download and install it first. Don't forget to download the vista drive icon pack either.
Monday, October 27, 2008 At 8:02 PM - Permalink
Leave a Reply